Glowforge Aura Project: Wood Slice + Paper Flowers

For this Glowforge Aura project, I’m using a birch wood slice and paper (both foiled cardstock and regular cardstock) to create this Christmassy wood ornament!
If you're wondering, no, it is never too early to start your Christmas projects!
Here are the SVG designs that I used in this tutorial: Merry Everything SVG | Rolled Paper Flower SVG | Leaves SVG
To see this Glowforge Aura tutorial in action, watch my YouTube video below! 😊
MATERIALS USED
Birch wood slices
Red/pink cardstock paper
Rose gold foil cardstock
Digital caliper
DESIGNS USED
Merry Everything SVG
Rolled paper Flower SVG
Paper Leaves SVG
PURCHASE THE AURA HERE
Amazon - Glowforge Aura
Joann - Glowforge Aura
Michael’s - Glowforge Aura
💰 Get $500 Glowforge Pro or $250 Glowforge Plus with this link HERE.

ENGRAVING BIRCH WOOD SLICE ORNAMENT
First things first let's measure the thickness of this wood slice. Using my digital caliper, I measured the thickness of this which came out to 0.47 inches. These wood blanks usually come in huge packs and I find them to be pretty much the same thickness for each wood piece. For this I am removing the cutting tray and placing it at the bottom of the Glowforge Aura and trying to center it where it will be directly underneath the camera when I close the lid.

After uploading the SVG design into the Glowforge app, I sized it down and placed it on top of the wood piece. For the engrave settings I went into Manual Mode and I left the speed at a 100, power I moved it up to 8, and the lines per inch I put 205. I hit print and it took 10 minutes to engrave!

CUTTING LIGHT CARDSTOCK (65-70LB)
If you've seen some of my older videos, I did a lot of paper flower tutorials with my Cricut, so it was kind of fun to get back into it! And I am going to use 80 pound cardstock as the material, even though this cardstock is about 65 to 70 pound card stock, the settings for 80 pound works great. The total time it took for cutting was about 5:37 minutes and I was pretty impressed by how detailed the cuts were, it even popped right out. So I went ahead and did a another two flowers with another scrap piece of cardstock!

CUTTING FOIL CARDSTOCK
Now let's cut some leaves out of this rose gold foil cardstock. For this particular cardstock I am going to place it foil side down with the brown back kraft paper side facing up. When doing my test cuts I found that it cuts through better this way with the foil facing downwards. Then in the glowforge app we are going to make a quick change to the settings, I am still using 80 pound cardstock but I am going to lower the speed to 55. Lowering the speed will make the laser have a deeper cut through this thicker foil cardstock, and in just under two minutes we have this pretty rose gold paper leaves!

If you've made rolled paper flowers before you already know how to do it, you already know how simple it is!
With a pick or toothpick, start at the end and just start rolling it up. Once the flower is rolled up use a little bit of glue on the circle to seal it. Then that’s it!
To see this Glowforge Aura tutorial in action, watch my YouTube video below! 😊
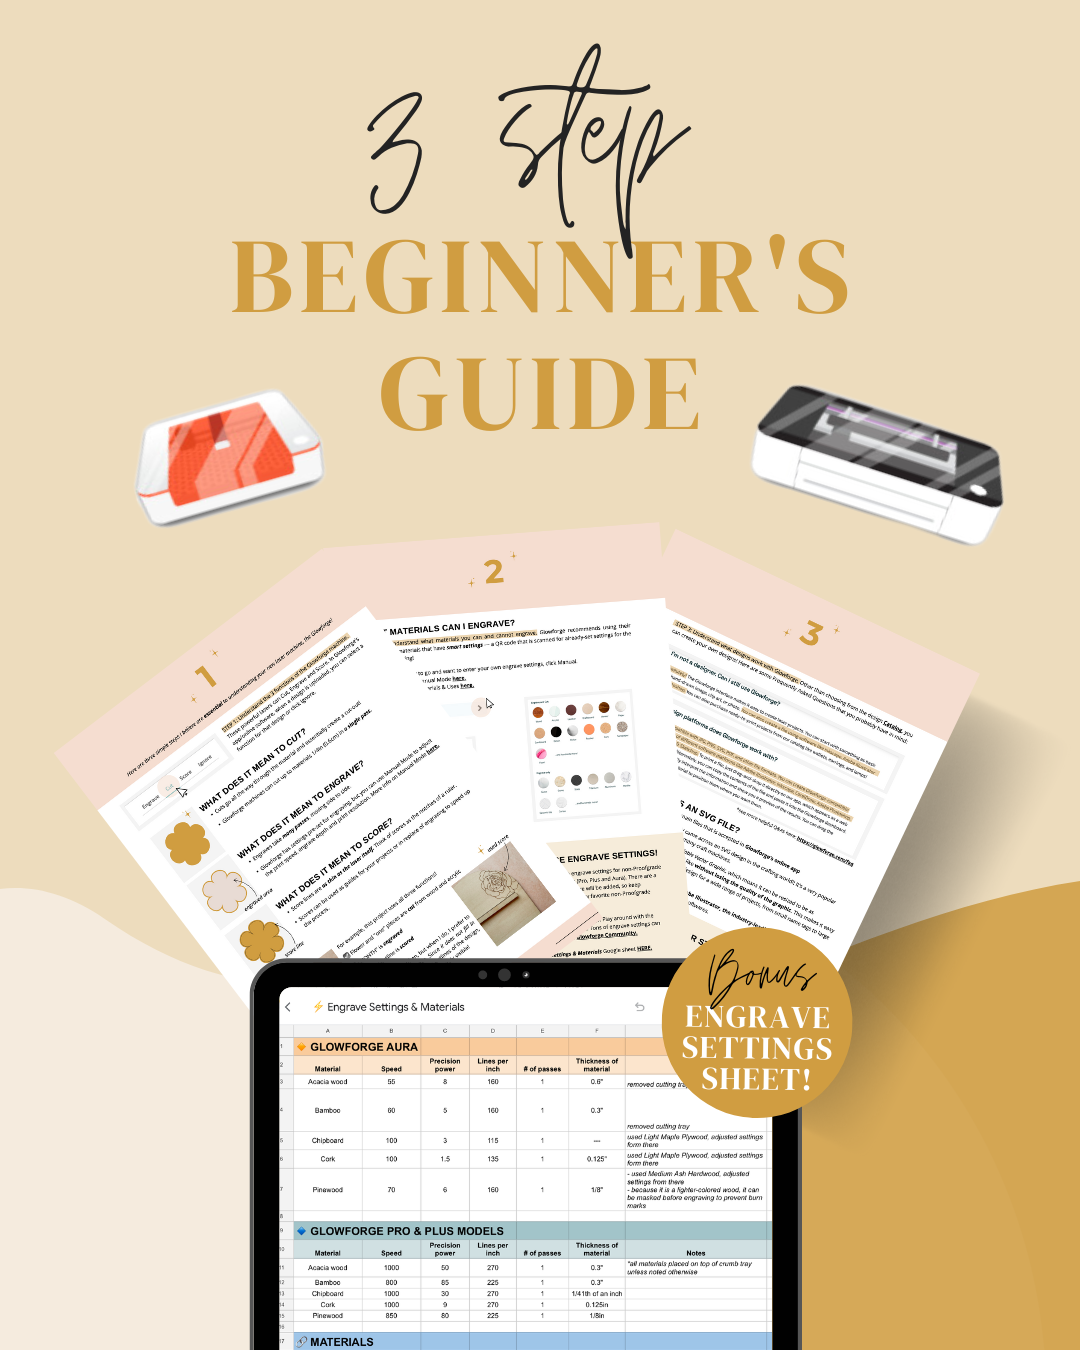
➡️ Want these settings all in one place? Download my BEGINNER’S GUIDE & ENGRAVE SETTINGS SHEET below! ✨
Remember, these settings are starting points. Depending on the specific characteristics of your material and the desired outcome, you may need to fine-tune the settings slightly. Try engraving on a scrap piece or small portion of the same material to ensure the desired effect before moving on to your final project!