Glowforge Aura Project: Large Sign

With my Glowforge Aura, I made a larger sign that is 2 feet long! I first designed the SVG file in Adobe Illustrator and then I cut and assembled the sign using the plywood and some glue! To see this Glowforge Aura tutorial in action, watch my YouTube video below! 😊
The Glowforge Aura does have pass-through slots on the side and that enables you to input any length of a material. But I actually did not use the pass-through slot, because I don't think that there is the software that’s like the Glowforge Pro Passthrough — where it basically tells you when to push your material through and it automatically aligns it. So hopefully in the future they come out with that!
⚡️ TRY ADOBE ILLUSTRATOR 7 DAYS FREE
MATERIALS USED
Basswood Plywood
Masking / transfer tape
Scraper tool
Wood glue
Super glue
Clamps / clips
FONT USED
Charming Lines Font Duo
PURCHASE THE AURA HERE
Amazon - Glowforge Aura
Joann - Glowforge Aura
Michael’s - Glowforge Aura
💰 Get $500 Glowforge Pro or $250 Glowforge Plus with this link HERE.

ADOBE ILLUSTRATOR OVERVIEW
In Adobe Illustrator, we are mainly going to use the Line Tool and Divide Tool to slice each “merry” word in half. This will result in four pieces, which will then be cut out of four sheets of 12x12” basswood plywood.

CUTTING THE PLYWOOD
Although I am using Basswood Hardwood, for my cut settings, I am just going to be using Medium Basswood Hardwood, so I will be selecting that and make sure to go into it and make sure that it Cuts. Then I'm going to hit Print when the button blinks!

Tthe total project time 14 minutes and 6 seconds to cut this out. (Keep in mind, this longer cut time is due to the fact that the Glowforge Aura laser has to pass through the material multiple times before cutting all the way through).

GLUING THE PLYWOOD PIECES TOGETHER
To put together this large sign, we will need several clips or claps. I have a bunch of these small ones that work great not only with wood projects but with other craft projects! We will also need glue — I have both wood glue and super glue but either one would work just fine. We essentially have two "merry" signs and this is where you can decide which sign you want to be on the top and which sign you want to be on the bottom. This is why I split them up in different areas when I was designing it in Adobe Illustrator.
After stacking the letters, I am gluing the two halves accordingly. I don't necessarily add glue where the slit is, if anything a quick spray paint or wood stain will fill in that little crevice.

Now this is where the clamps come in. I am focusing on securing the area where the two halves connect. I ended up adding a bunch of clamps throughout and usually I let my glue set for an hour before removing the clamps. Usually I leave my wood pieces out overnight and then by the next morning it is fully bonded, so right now it is bonded pretty well and I measured it and this came out to be 24 inches long, so that's two feet and that's just pretty impressive for what you could do with the Glowforge Aura!
To see this Glowforge Aura tutorial in action, watch my YouTube video below! 😊
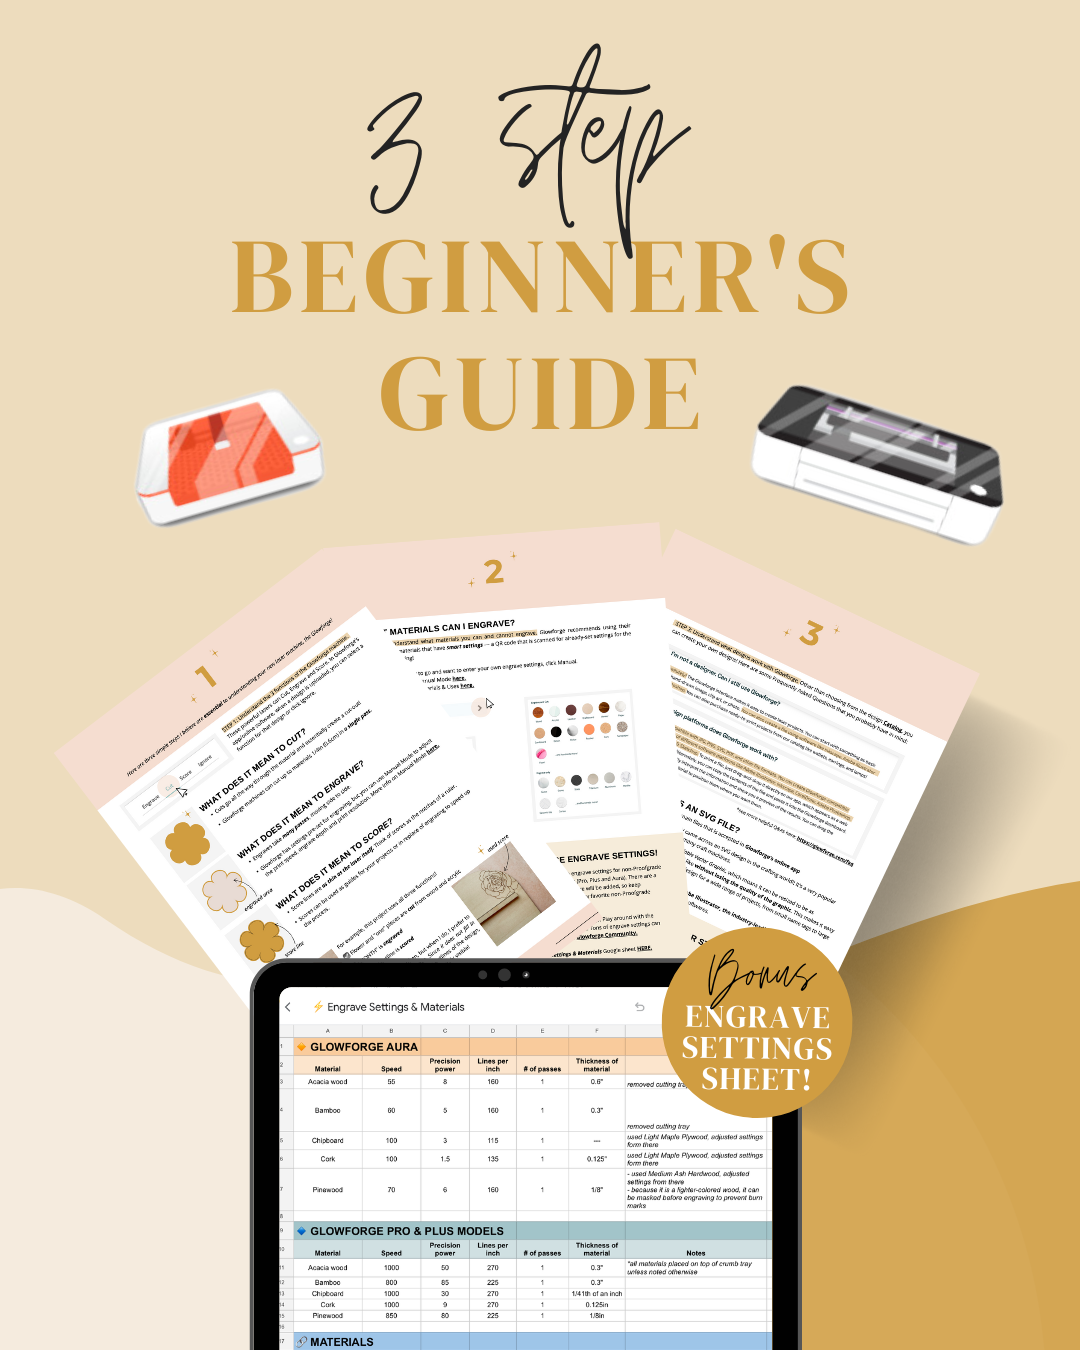
➡️ Want these settings all in one place? Download my BEGINNER’S GUIDE & ENGRAVE SETTINGS SHEET below! ✨
Remember, these settings are starting points. Depending on the specific characteristics of your material and the desired outcome, you may need to fine-tune the settings slightly. Try engraving on a scrap piece or small portion of the same material to ensure the desired effect before moving on to your final project!